AWS just announced support for UDP in their Network Load Balancer.
https://aws.amazon.com/blogs/aws/new-udp-load-balancing-for-network-load-balancer/
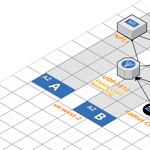
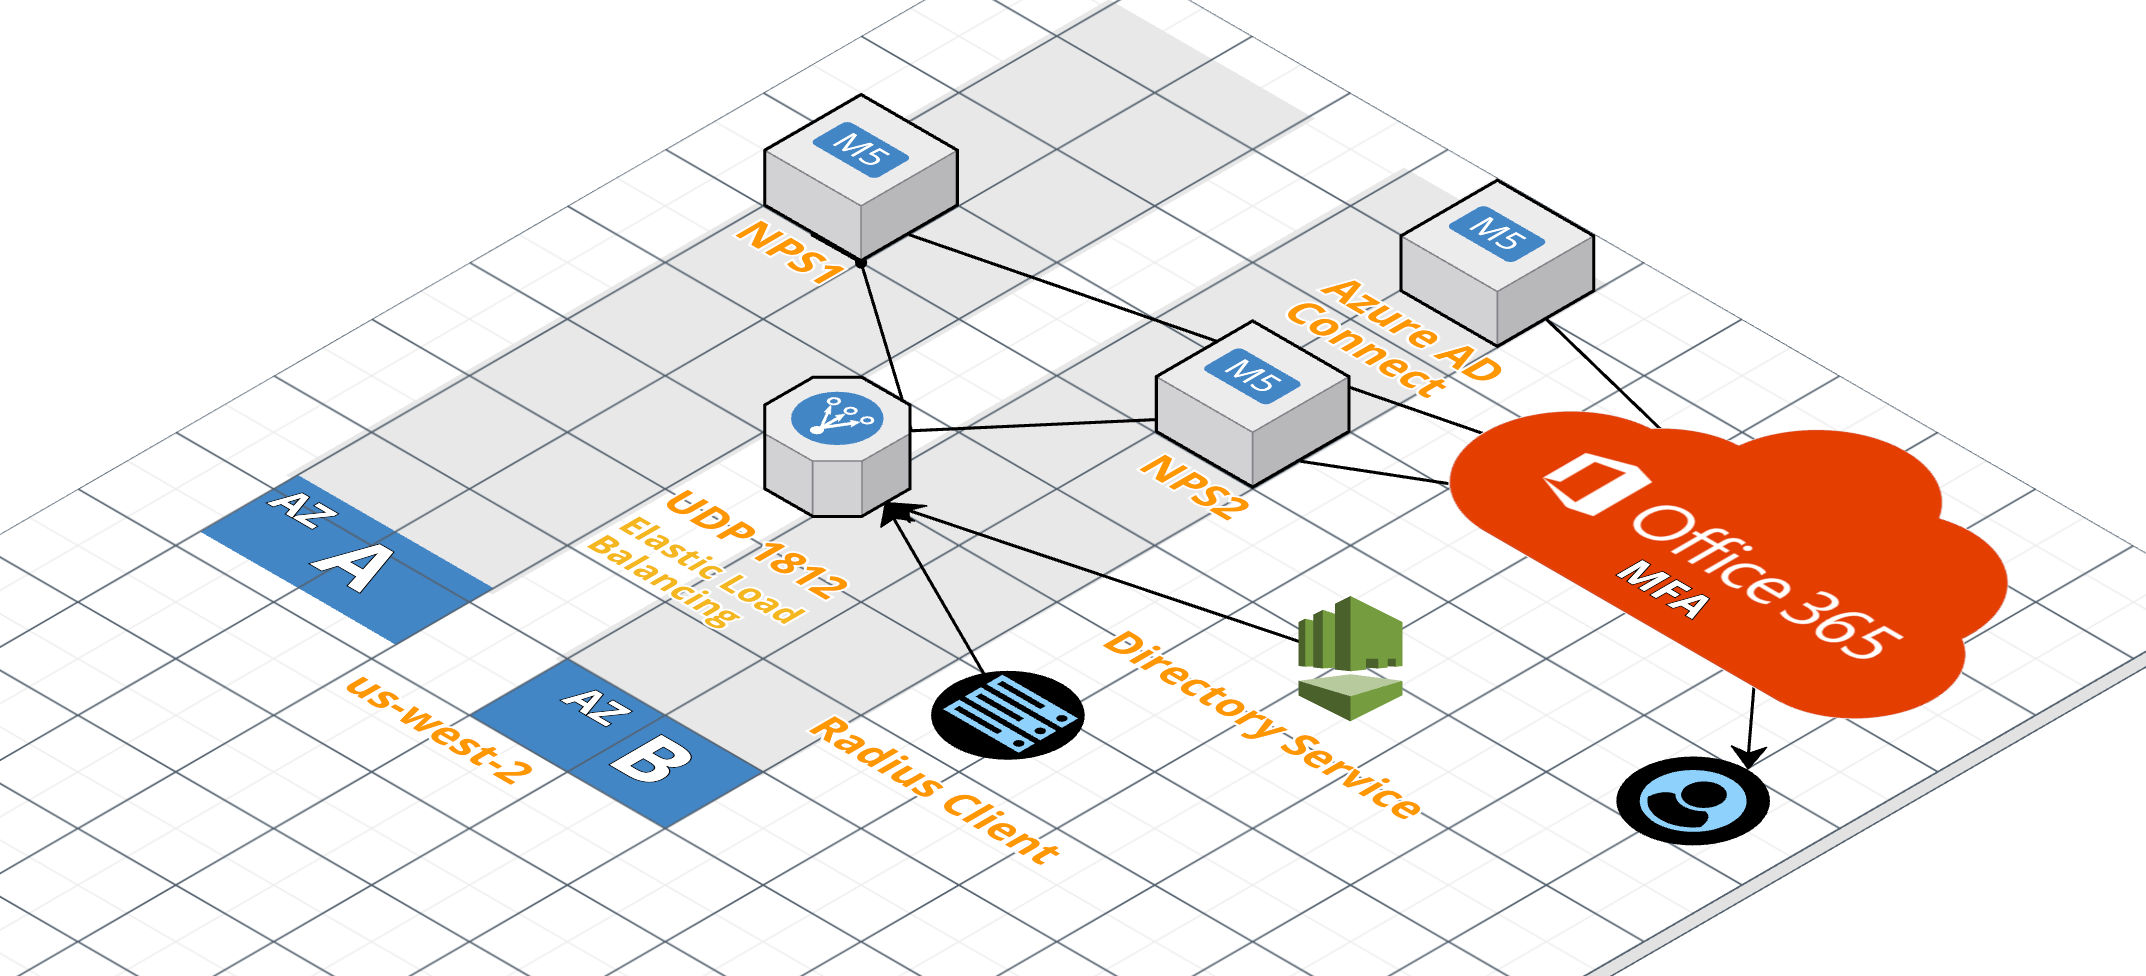
We can take advantage of this right away to make our Microsoft NPS servers with the Azure MFA extension (MFA in the cloud) highly available within our AWS environment. If you are already invested in Office 365, it makes sense to take advantage of the built-in MFA capabilities. You can extend that MFA to on-premises using the Azure MFA NPS Extension. We can attach individual Radius clients as well as the AWS Directory Service to our new UDP network load balancer to bring MFA to services like Amazon Chime, WorkDocs, Workspaces, etc.
Prerequisites:
There are a few prerequisites that will be required for our solution.
- An active or trial Office 365 subscription.
- Azure AD Connect to synchronize our on-premise directory into Office 365.
- A pair of Microsoft NPS servers with the Azure MFA Extension loaded.
- Security groups to allow UDP traffic to our NPS servers
NPS Setup:
Here are quick set of steps to get the NPS servers up and running
1) Install the NPS feature
PS> Install-WindowsFeature NPAS -IncludeManagementTools
2) Register the server in AD
PS> netsh nps add registeredserver <domain> <server>
3) Download and Install the Azure NPS Extension
Run the downloaded file and then configure from powershell
PS> cd “C:\Program Files\Microsoft\AzureMfa\Config”
PS> .\AzureMfaNpsExtnConfigSetup.ps1
Please note you will need:
- Global administrator credentials for your Office 365 tenant
- The tenant ID (found in properties under Azure Active Directory)
- Licensed for Azure AD Premium, Enterprise Management Suite (EMS), or an MFA subscription.
4) Add a test Radius client to verify the server is working as expected.
PS> New-NpsRadiusClient -Address <ip address> -Name “Test Radius Client” -SharedSecret <Secret Key>
We should be ready to test our MFA configuration now. I use the NTRadPing utility to test with.
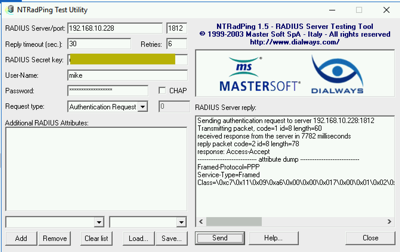
I received the authentication on the Microsoft authenticator app on my iOS device and approved the login.
5) Setup the second NPS server.
We need to setup the second NPS server for our load balancer. We don’t really have a “cluster”, but just a pair of NPS servers that we will keep in sync with configuration. Repeat the steps above to create the second NPS server in the second availability zone.
To keep the NPS servers in sync, I just use the following commands:
From NPS1: PS> Export-NPSConfiguration -Path <file path>
From NPS2: PS> Import-NPSConfiguration -Path <file path>
AWS ELB Setup
At this point we have a pair of identical functional NPS servers. Now we can create our AWS ELB to load balance the UDP traffic to our NPS servers to provide high-availability. You can do these steps from the console although I will use the AWS CLI to create it.
1) Create the load balancer:
aws elbv2 create-load-balancer –name nlb-int-nps –type network –scheme internal –subnets <subnet 1> <subnet 2>
2) Create the target group:
aws elbv2 create-target-group –name ms-int-nps –protocol UDP –port 1812 –health-check-protocol HTTP –health-check-port 80 –vpc-id <vpc id>
3) Register the targets:
aws elbv2 register-targets –target-group-arn <target group arn> –targets Id=<instance 1> Id=<instance 2>
4) Create the listener:
aws elbv2 create-listener –load-balancer-arn <load balancer arn> –protocol UDP –port 1812 –default-actions Type=forward,TargetGroupArn=<target group arn>
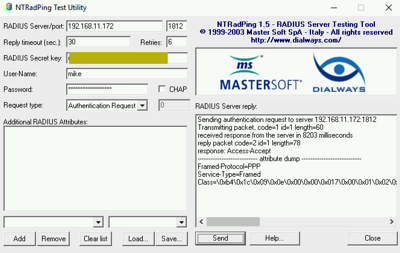
We should now have two healthy NPS instances
![]()
Just repeat the Radius client tests using the internal load balancer IPs to verify the NLB is functioning.
We can now modify our existing AWS directory service to point to the new UDP enabled NLB.
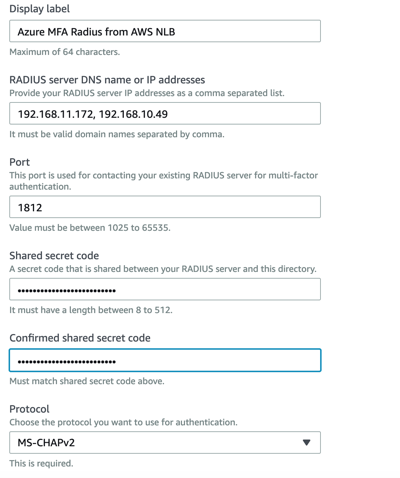
AWS Directory Service
Now let’s enable our AWS Directory Service to point to the load balancer. We will need to create two new Radius clients with the IP addresses of our AWS directory service connector.

Don’t forget to sync up the NPS servers after you add the new clients. Now enable Multi-Factor Authentication on our directory service.
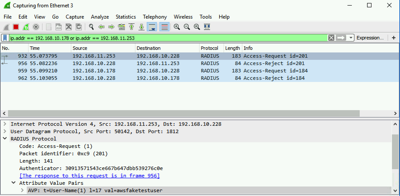
If you are having problems getting the Multi-Factor Authentication setup to complete on your directory, when the directory service creates the Multi-Factor authentication configuration it sends an account ‘awsfaketestuser’ to the Radius server with no password. Go ahead and create this account in your directory and it will return the Access-Reject message and complete the configuration. You can delete the account after this is complete.
We should see the completed multi-factor authentication directory setup.

Cloud On!